
Are you craving some easy sweets to whip up for your next party? Or really, just something to satiate your sweet tooth cravings? Then it’s your lucky day because we’ve got a ton of delicious dessert recipes for you to try out. We’ve compiled some of our best and easiest desserts that you can find in a bakery. There’s no need to line up to get the best baked (and non-baked!) goods when you can recreate them at home!
Dessert is a course that ends a big, hearty meal. It provides a touch of sweetness from all those savory plates to give you a well-rounded meal. There’s always room for dessert, after all. They come in many shapes and flavors, from puddings, cookies, ice creams, and many more. No meal would ever be complete without a sweet little end to it.
And we’ve got a wide range of delectable easy dessert ideas that is sure to blow you away! It’s categorized into no-bake desserts, desserts with few ingredients, healthy desserts, and unique treats. And there’s a variety of sweets like pies and pastries recipes, cakes recipes, and more. Each recipe will give you easy-to-follow instructions for a quick sweet treat.
These mouthwatering baked goods are some of the best desserts to serve at parties and picnics. Some are aesthetically pleasing enough to even sell at bake sales. Or make them at home just because you want to! We won’t judge you for it.
So grab your baking sheets and turn up the oven heat! It’s time to start baking these oh-so-good easy desserts.
Desserts With Few Ingredients
We promised you easy, and we make sure to deliver! Here are some delicious desserts that require few ingredients, and are easy to whip up. You’ll get a few samples from three to about seven ingredients. So if you’re on a tight budget or don’t have a lot of fancy ingredients on hand, these sweets are just for you.
3-Ingredient Soda Pop Cupcakes Recipe

This cupcake dessert is deliciously made with cake mix, lemon or lime soda, and cool whip. How easy is that? Just whip them up in a bowl, transfer to cupcake tins, and you’ve got yourself some instant cupcakes. Customize these Soda Pop cupcakes with a touch of lemon or lime wedge to make them extra special. This is one of our most flavorful lemon dessert recipes, so give it a shot for your next baking venture.
Recipe for Inspiration: 3-Ingredient Soda Pop Cupcakes Recipe
Copycat Trefoils Recipe
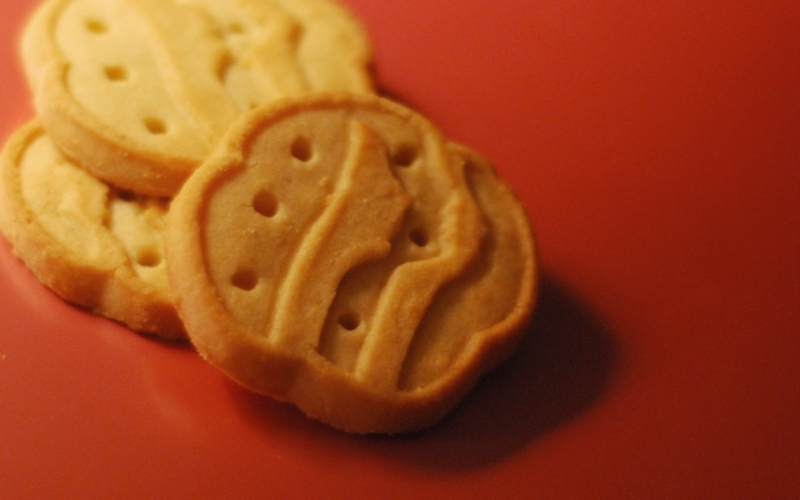
Tk Vasoli | Flickr.com
Is girl scout season over or still months away? Worry not, for our tasty Trefoils Shortbread Cookies are here to solve your woes. These girl scout cookies come with only five ingredients. Even better, they’re all readily available in your pantry. Craving for more girl scout cookies? Try these tangy Savannah Smiles next time for a different flavor.
Recipe for Inspiration: Copycat Trefoils Recipe
1-2-3 Toffee Cake Recipe
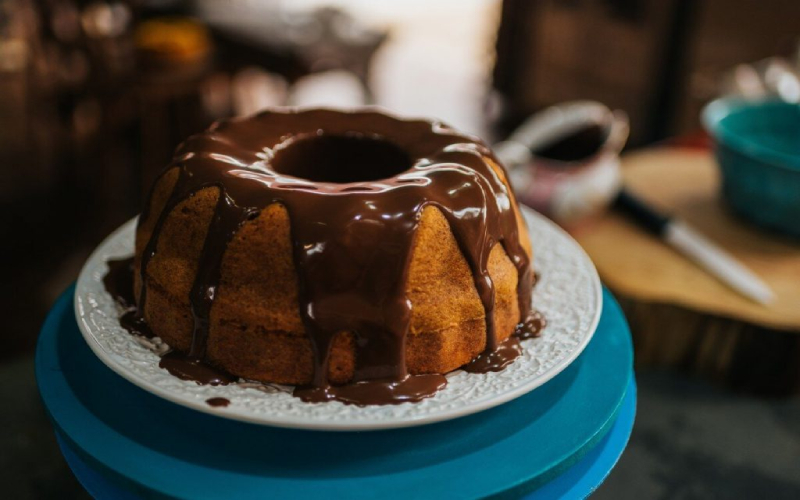
For something sticky but oh-so-delicious, try out our 1-2-3 Toffee Cake! It’s just a tasty combo of chocolate mix, your favorite toffee candy bars, and cool whip. Toffees are crunchier than caramel and give a darker, more bold flavor to your cake. So if you’re looking for something different from the usual caramel, this dessert is for you!
Recipe for Inspiration: 1-2-3 Toffee Cake Recipe
M&Ms Brownie Trifle Recipe
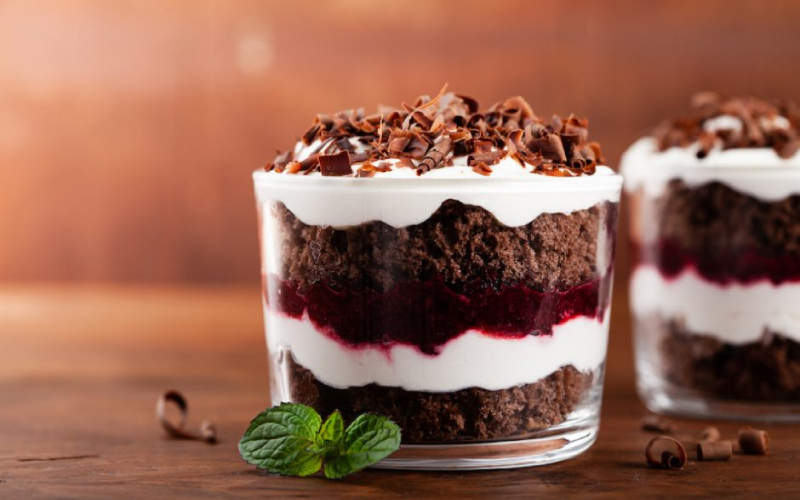
If you’re looking to indulge in some chocolaty goodness, then this M&Ms Brownie Trifle fits the bill! It’s one of our chocolate dessert recipes made with only six ingredients and takes only an hour to make. This exquisite trifle comes with a classic candy favorite of M&Ms and snickers. Each layer comes with a different surprise, making it a fun snack for kids. Try adding some raspberry jam in between layers to enhance the chocolate flavors.
Recipe for Inspiration: M&Ms Brownie Trifle Recipe
3-Ingredient Crescent Roll S’mores Recipe
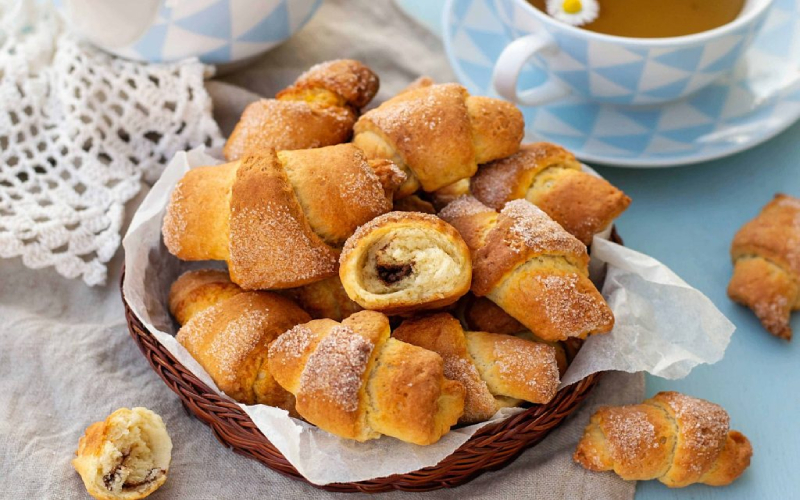
Who says you can only make s’mores with graham crackers? Our Crescent Rolls S’mores are here to prove that they’re just as good as a tasty pastry. This puff pastry recipe is one of those delectable easy desserts to make. It also comes with simple ingredients of a crescent roll dough, marshmallows, and chocolates. Serve these camp-fire side for a delicious, no-mess treat.
Recipe for Inspiration: 3-Ingredient Crescent Roll S’mores Recipe
No-Bake Dessert Recipes
Now, this is definitely one of those quick dessert recipes that you can get behind! These don’t require turning up the oven and chilled no bakes are especially perfect for the summer. This time, let your refrigerator or microwave do the amazing work on these easy no-bake desserts.
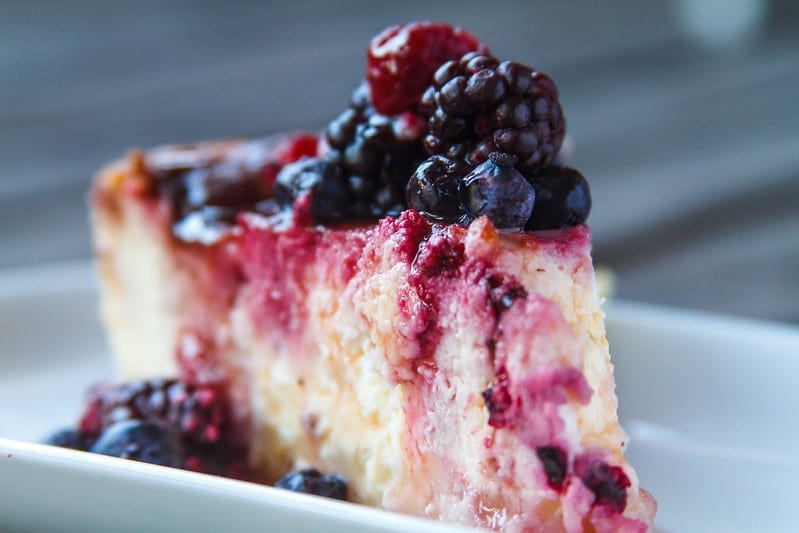
No-Bake New York-Style Cheesecake Recipe
Alan Goldfarb | Flickr
Now here’s a more decadent dessert that’s sure to tickle your taste buds! This rich and creamy New-York Style Cheesecake is one of the best no bake summer desserts. Whip everything up in a bowl, layer it up in your cheesecake pan, and let the fridge do the cooling. It tastes just as delicious as a baked cheesecake, if not more! They will definitely make the perfect afternoon snack on a hot summer day.
Recipe for Inspiration: No-Bake New York-Style Cheesecake Recipe
No-Bake Triple Chocolate Brownie Recipe
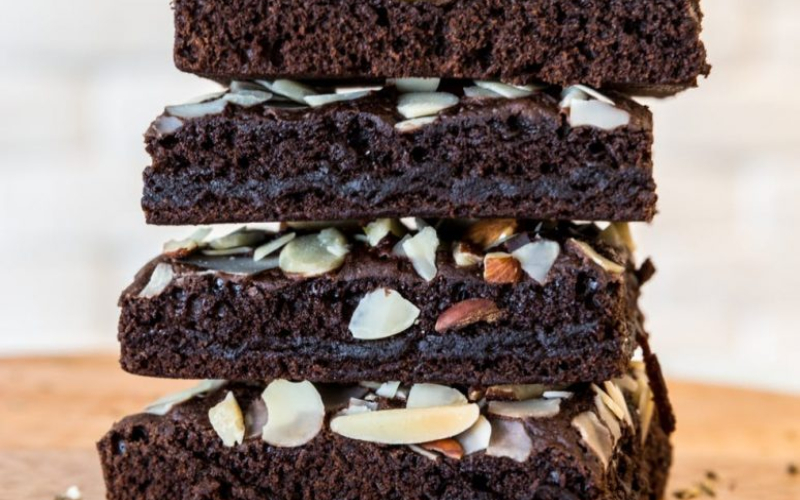
These decadent, Triple Chocolate Brownies are perfect for your chocolate lover friends. This sweet treat is one of our easy dessert recipes with condensed milk that requires zero flour. You’ll still be able to get that fudgy brownie texture with just six simple ingredients. Try this no-fuss brownie as the best little gift for your friends this Christmas!
Recipe for Inspiration: No-Bake Triple Chocolate Brownie Recipe
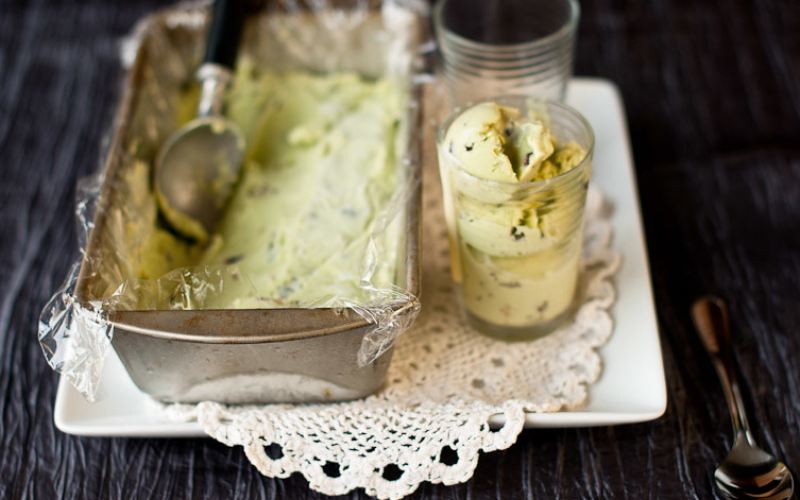
Sweet Avocado Ice Cream Recipe
Eliza Adam | Flickr
Ice cream is not exactly something you can get from a bakery. But let’s face it, who doesn’t love ice cream? Skip the warm bakery and recreate this delicious Sweet Avocado Ice Cream at home. This is one of our gluten free dessert recipes that’s whipped up in just 10 fast minutes! Although the freezing part may take a while, we promise it will be worth the wait. No need to use a fancy ice cream maker to create this sweet treat. Enjoy smooth and creamy avocado ice cream anytime on a hot summer day!
Recipe for Inspiration: Sweet Avocado Ice Cream Recipe
No-Bake Peanut Butter Balls Recipe
These tasty Peanut Butter Balls are perfect little treats that will give you a boost of energy. You’ll get a delicious combo of smooth peanut butter and crunchy cereal to munch on. It’s so easy to make, and comes with only a few simple ingredients you already have on hand. Just toss everything in a bowl and form them with your own hands. It’s one of those simple desserts that are quick to make, but remarkably delectable.
Recipe for Inspiration: No-Bake Peanut Butter Balls Recipe
Easy Mug Apple Pie Recipe

Who says you need an oven to make a delectable apple pie? If you’re craving a small, but filling sweet dessert, this Mug Apple Pie is an instant go-to! All you have to do is mix all your ingredients in a mug (real apple slices included!), and let the microwave do its magic. It’s the perfect midnight snack or if you’re simply wanting a quick apple pie bite without all the baking.
Recipe for Inspiration: Easy Mug Apple Pie Recipe
Healthy Desserts
Is there such a thing as a healthy dessert? We say there is! You don’t have to feel guilty about munching on these nutritious desserts. They’re so good, you won’t even be able to taste the difference between them and a more sugary treat. We have a range from sugar free dessert recipes to quick, non-bake ones. So if you’re the type that’s watching your food intake but still have a penchant for sweets – these recipes are for you!
Cloud Bread Recipe

One of the best healthy baked goods we have is this iconic Cloud Bread recipe. This keto, low-carb bread is the best brunch treat you can serve to a couple of friends. They’ll be so surprised by how delicious, yet tastefully nutritious it is. For a no-fail, perfectly fluffy cloud bread – bake these off in the oven. It will help retain the shape and still have that soft-as-a-cloud texture. So grab some of this recipe’s on-hand ingredients, and get baking!
Recipe for Inspiration: Cloud Bread Recipe
Sugarless Pumpkin Pie Recipe
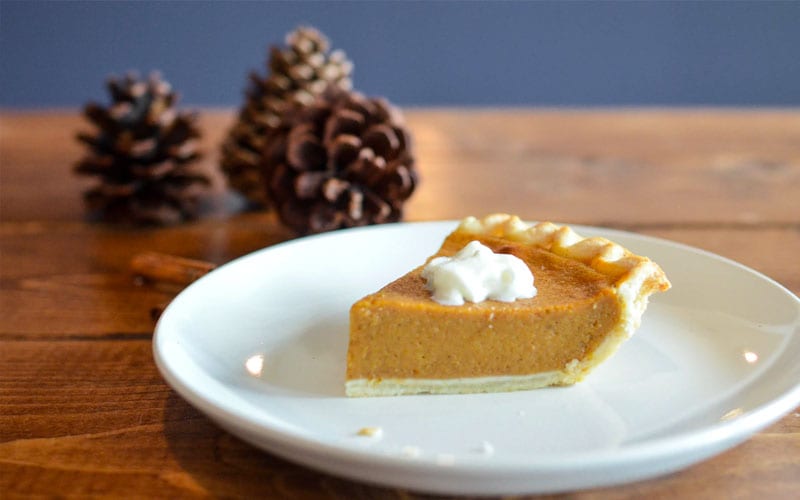
This Sugarless Pumpkin Pie is the kind of dessert you should be serving for Thanksgiving! It’s a guilt-free dessert to have after having a big, belly-filling meal. This is one of our pumpkin dessert recipes that uses natural sweeteners. It’ll have that same sweetness that you’ll get from regular sugar, but better. Have a slice or two more of this classic pie for the coming holidays! For more healthy Thanksgiving desserts like this, try our mouthwatering Sweet Potato Casserole.
Recipe for Inspiration: Sugarless Pumpkin Pie Recipe
Fresh Fruit Tarts Recipe

You don’t even need to trick the kids into taking a bite of this colorful dessert. These Fresh Fruit Tarts are one of our quick desserts that come with the best fruit combos. It looks too good to eat, but let’s face it – no one will resist grabbing a tart or two of these. Just pile up the fruits into mini tart shells, add just a tiny bit of whipped cream if you wanted, and voila! An instant appetizer that both kids and adults will surely enjoy.
Recipe for Inspiration: Fresh Fruit Tarts Recipe
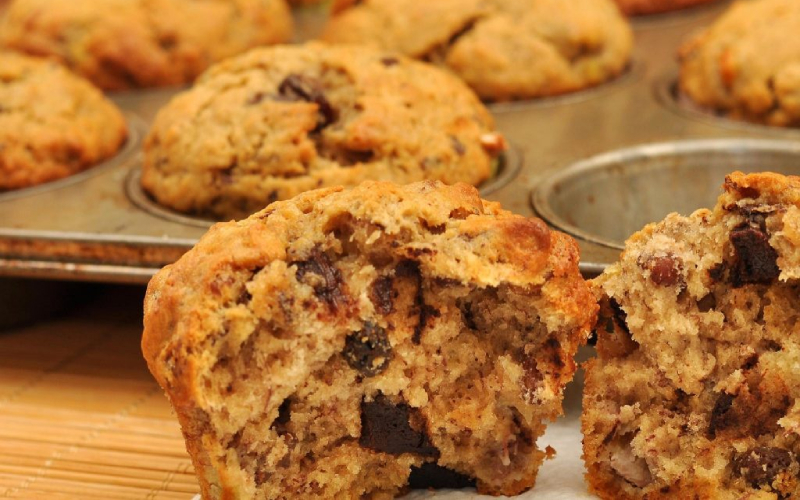
Banana Cupcakes with Dark Chocolate Chunks Recipe
jeffreyw | Flickr
Do you know what’s better than a banana cupcake? A banana cupcake loaded with dark chocolate! It is no secret that dark chocolate is significantly healthier than milk chocolate. So it makes perfect sense to pair it up with an equally healthy ingredient. This is one of those healthy banana desserts that has wins on both sides. You’ll get potassium from the bananas, and powerful antioxidants from the dark chocolate. Bananas are already sweet, and to balance that out, we made use of the dark chocolate’s bitterness. Convinced yet? Then grab those overripe bananas, and get baking!
Recipe for Inspiration: Banana Cupcakes with Dark Chocolate Chunks Recipe
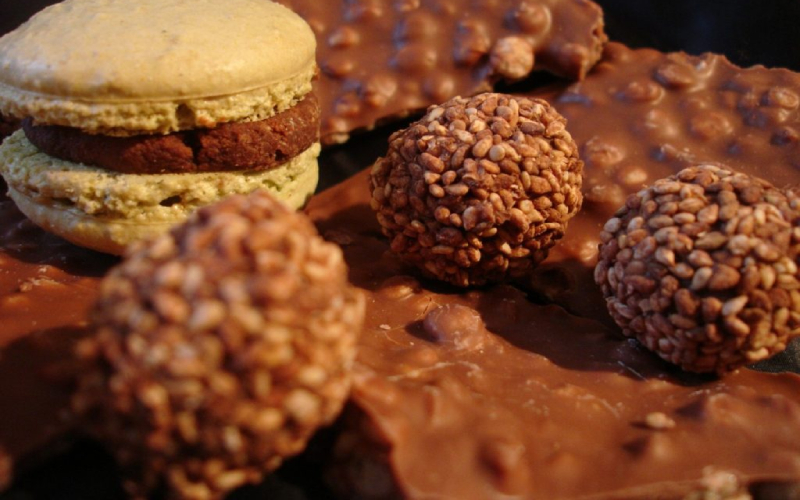
Sugar Free Dark Chocolate Nut Fudge Recipe
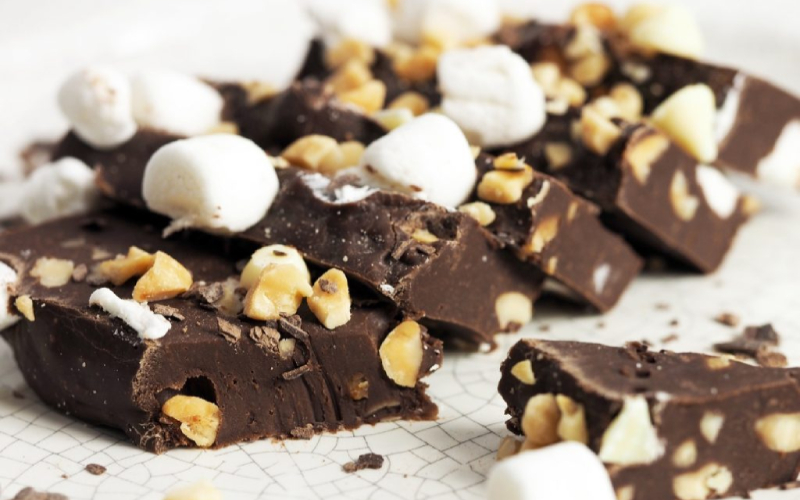
Who doesn’t love a good fudge treat? This is one of those dessert recipes that’s guaranteed to put a smile on someone’s face. Get your chocolate fix with this Sugar Free Dark Chocolate Nut Fudge. It’s a simple, yet delightfully indulgent dessert to have in the middle of the day. This is definitely a one-pot easy dessert that you can make any time. Cook these up in batches and send them out as gifts to your friends for Christmas!
Recipe for Inspiration: Sugar Free Dark Chocolate Nut Fudge Recipe
Thanksgiving Desserts
What’s a sweet list without some Thanksgiving dessert recipes? We’ve got a ton of easy things to bake so you don’t have to worry about dessert on this busy holiday. Pumpkin pie isn’t the only sweet you can recreate for this special day. These are quick and easy dessert recipes with minimal fuss and all the fun.
Pumpkin Cookies Recipe

Make your Thanksgiving more fun with a batch of yummy Pumpkin Cookies! They’re made with real pumpkin and classic Thanksgiving flavors to give you an authentic and tasteful snack. This is one of those light desserts that guests will not grab seconds or more for. Enjoy a cookie or two of this fun-looking treat after your big Thanksgiving meal.
Recipe for Inspiration: Pumpkin Cookies Recipe
Southern Pecan Pie Recipe
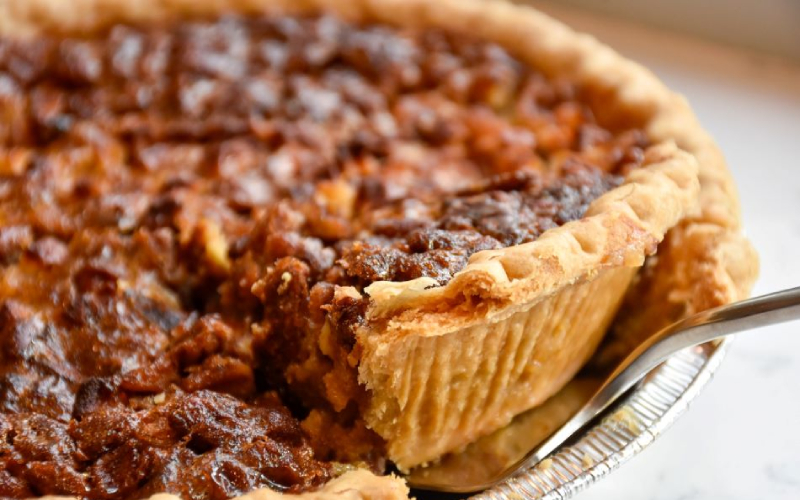
Nothing is more fall than a good Southern Pecan Pie. Try baking this easy dessert recipe in less than an hour. It’s made with fewer hassle thanks to the pre-made pie crust. Guests will be too busy loving the meld of sweet pecans and vanilla to care about that pie shell. So grab these few ingredients, and get cooking with this simple, but absolutely scrumptious pecan pie.
Recipe for Inspiration: Southern Pecan Pie Recipe
Easy Caramel Apple Bread Pudding Recipe
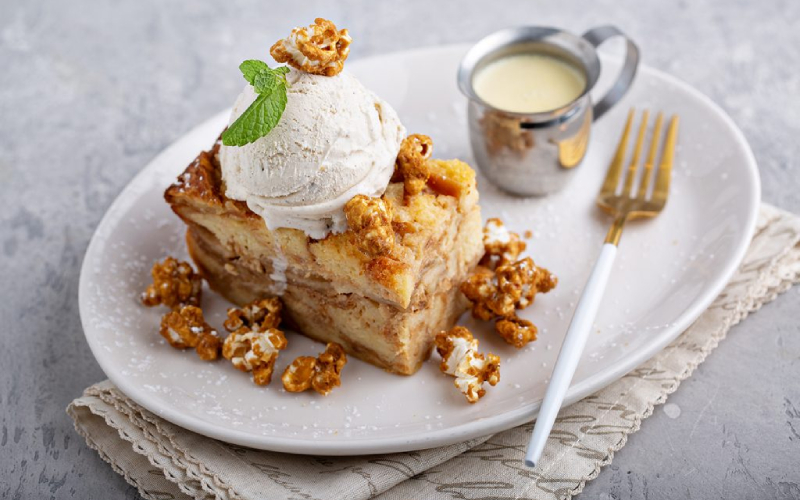
Caramel apple bread pudding with ice cream and popcorn, fall dessert
No Thanksgiving meal would be complete without having some sort of apple treat in there. If you’re tired of the usual apple pie, then this Caramel Apple Bread Pudding is your way to! It’s one of our apple dessert recipes that takes no time to make. Just combine and toss everything, and let your oven do the magic for you. Get an amazing combination of apple, cinnamon, raisins, and caramel all in one bite. We guarantee it makes the perfect after-meal pudding to munch on!
Recipe for Inspiration: Easy Caramel Apple Bread Pudding Recipe
Easy Pumpkin Brownie Recipe
Getting tired of pumpkin pies? Then bake something more unique, but equally delicious like our Pumpkin Brownies! This one of those Thanksgiving dessert recipes that comes with the finest autumn flavors, with a sweet surprise of cream cheese. It’s a one-bowl assembly, so you can have this cooked up fast in the middle of the whirlwind of cooking meals for the big dinner. Turn up the oven and start mixing up this tasty treat today.
Recipe for Inspiration: Easy Pumpkin Brownie Recipe
Sweet Potato and Pumpkin Spice Packed Muffins Recipe
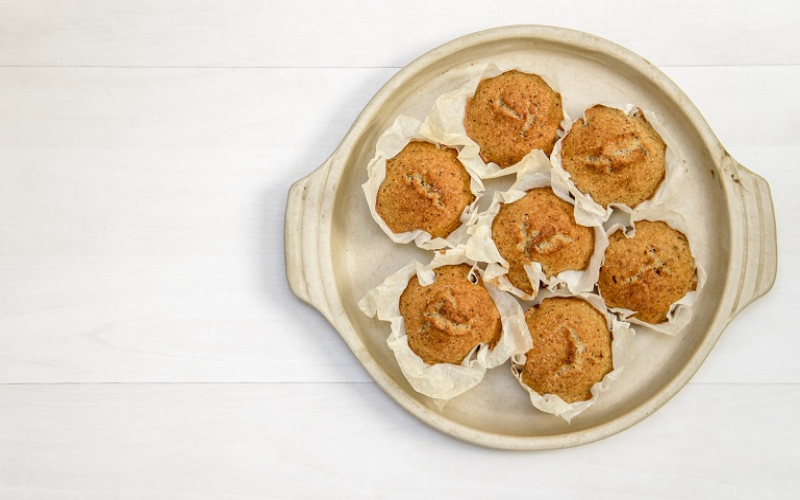
Sweet potato in a muffin? It’s more common than you think! If you’d rather not be fussed with a sweet potato casserole, then go for the easy route with our Sweet Potato and Pumpkin Spice Packed Muffins. This is one of those quick easy desserts that takes less than 30 minutes to make! It’s packed with that classic Pumpkin Spice flavor and that creamy, sweet texture of a sweet potato. Serve this up at Thanksgiving to give your guests a sweet ending to a filling dinner.
Recipe for Inspiration: Sweet Potato and Pumpkin Spice Packed Muffins Recipe
Christmas Desserts
No dessert collection would be complete without some jolly good sweets! Turn up the oven, because we’ve got a bunch of Christmas dessert recipes that will blow you away. We have it all from light desserts to filling and extra flavorful dishes. Celebrate the holidays making these easy to make desserts, and enjoy assembling them with friends and family.
Butterscotch Gingerbread Cookies

If you’re looking for some fun desserts to make, then you’re in the right place! Our Gingerbread Cookies have all the classic spices of cinnamon, ginger, and cloves. But what makes this extra special is the added flavor of Butterscotch. It amplifies those usual gingerbread cookie flavors and adds a new taste to a beloved classic. Call on the kids to help you cut up and decorate these yummy gingerbread cookies! Kids and adults will surely enjoy a bite of these on the big day.
Recipe for Inspiration: Butterscotch Gingerbread Cookies Recipe
Oreo Peppermint Balls Recipe

Take a chance on one of our easy dessert recipes with few ingredients in the form of Oreo Peppermint Balls! No Christmas treat will ever be complete without involving peppermints. And these yummy balls of oreo and peppermint are sure to deliver those exact flavors. They’re perfect as snacks for big Christmas parties or even sweet little gifts for those closest to you. Either way you serve it up, it’s sure to give someone some holiday cheer!
Recipe for Inspiration: Oreo Peppermint Balls Recipe
White Chocolate Holiday Bark Recipe
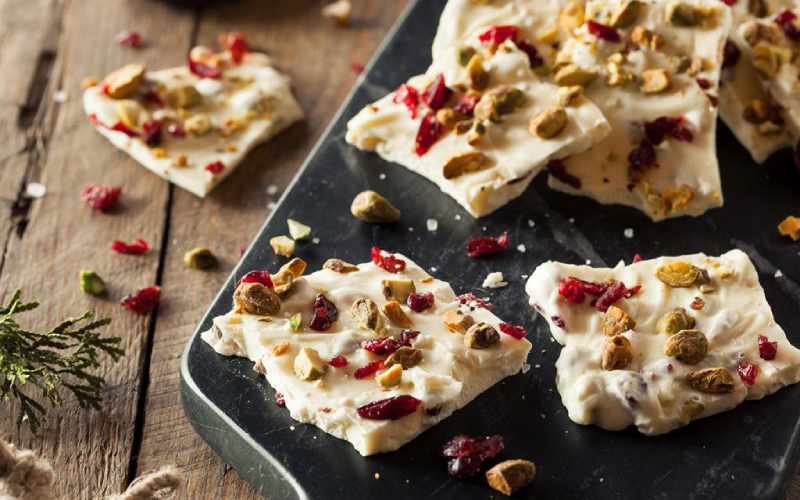
No treat is easier to make than a fruity and nutty snack like our White Chocolate Holiday Bark! It’s one of our fun desserts to make that’s made with simple, but absolutely tasteful ingredients. Grab a bite of this sweet white chocolate snack filled with tasty pistachio nuts and sour cranberries for a good pick-me-up treat. They’re so beautiful to look at, it’s almost impossible to munch on them. These would make the perfect Christmas gifts for friends or co-workers to get them into the holiday spirit.
Recipe for Inspiration: White Chocolate Holiday Bark Recipe
Tiramisu Mousse Recipe
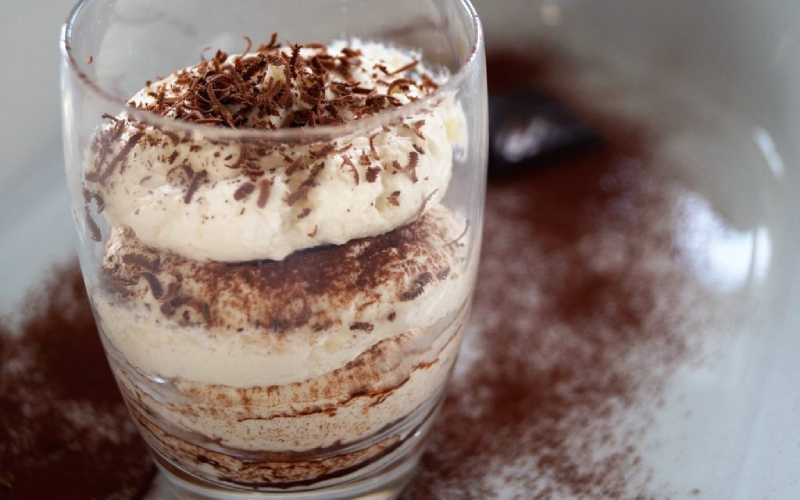
Take a gander at one of our Italian dessert recipes in the form of creamy Tiramisu! Our Tiramisu Mousse is incredibly light, airy, and packed with chocolatey flavor. You can never go wrong with one of these easy dessert recipes that require no baking. Just layer them up, pop them in the fridge, and they’ll be good to go just in time for dessert. It’s the perfect treat to serve up to your guests that have more room for dessert, but nothing too heavy to make the pants pop!
Recipe for Inspiration: Tiramisu Mousse Recipe
Holiday Cherry Squares Recipe
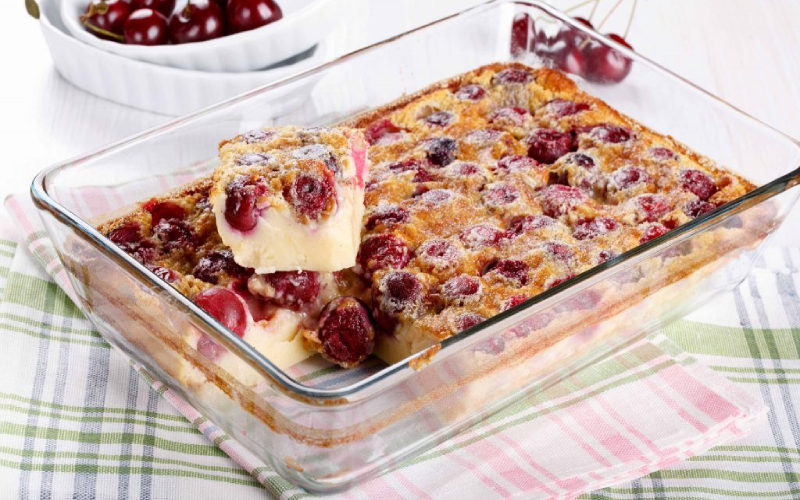
Make Christmas day as sweet as can be with these Holiday Cherry Squares! Similar to a dump cake, these fruity squares make the perfect light desserts after a big meal. It’s got strong cherry flavors, with a nice covering of graham cracker for a crunchy bite. Just toss everything in a casserole dish, then pop them in the oven to bake for less than 30 minutes. They’re best-served chill, so don’t forget to make these ahead to give your guests a perfect ending to a big Christmas meal.
Recipe for Inspiration: Holiday Cherry Squares Recipe
Unique Desserts
We’re ending our list on a sweet note on some recipes with a twist. These are some desserts that will make you wonder why it even exists. But trust us when we say that these flavor combos will make you think twice about doubting them. They’re just as good as any of your classic desserts, perhaps even better. So without further ado, here are some unique desserts to make at home!
Coconut Almond Macaroons Recipe
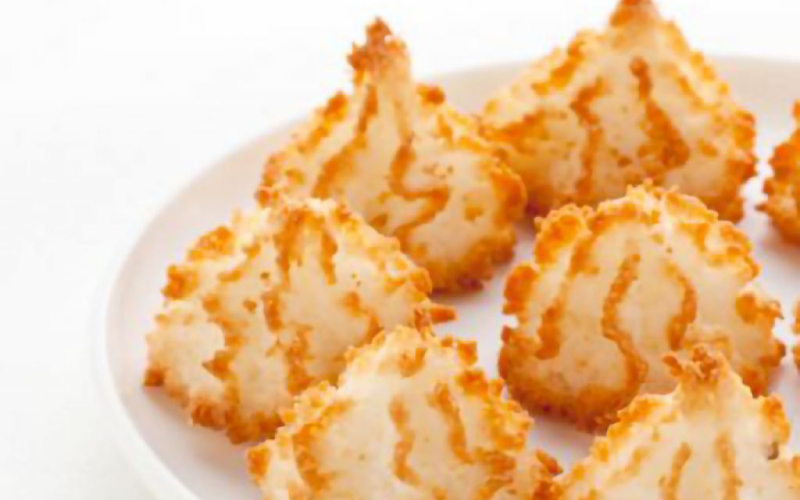
Do not mistake these delicious little snacks for French macarons. While they both contain some form of almond, these Macaroons are definitely one of a kind. They are cookies that have a crispy and slightly rough texture. But you’ll be thoroughly surprised by how tasteful they are! These tasty desserts are a lot like meringue cookies, but with added texture from the flaky coconuts. They’re best paired with warm tea or coffee, and make such remarkable noon-time snacks. Try something different for tea time with these delectable Coconut Almond Macaroons!
Recipe for Inspiration: Coconut Almond Macaroons Recipe
Spiced Chocolate Zucchini Cake Recipe
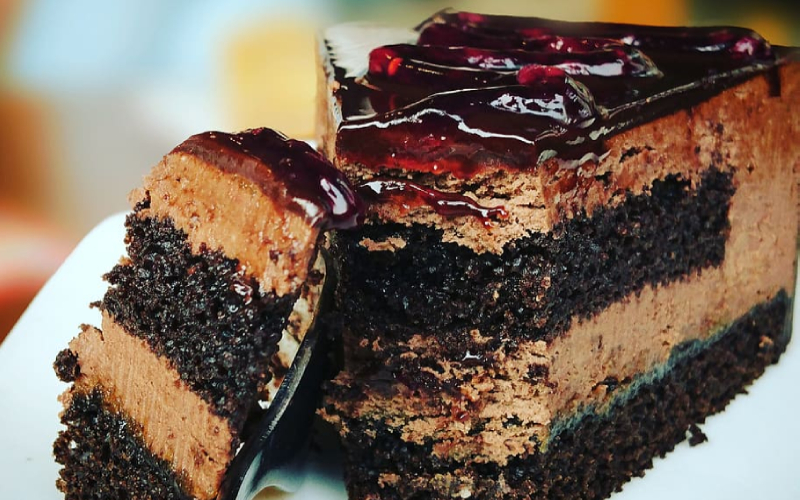
Now, this is one of those unique desserts that will keep you on your toes! You might have heard of desserts like zucchini bread and chocolate cake before. But combine those two together, and you’ve got yourself a bakery-worthy cake. This Spiced Chocolate Zucchini Cake sounds something like you would have customized at a bakery. But you don’t have to line up to have these custom-made when you can make them at home. This dense, but amazingly moist cake is perfectly seasoned to give you the best flavor. If you’re in the mood to experiment on some easy to make desserts with a twist, this one’s a sure winner!
Recipe for Inspiration: Spiced Chocolate Zucchini Cake Recipe
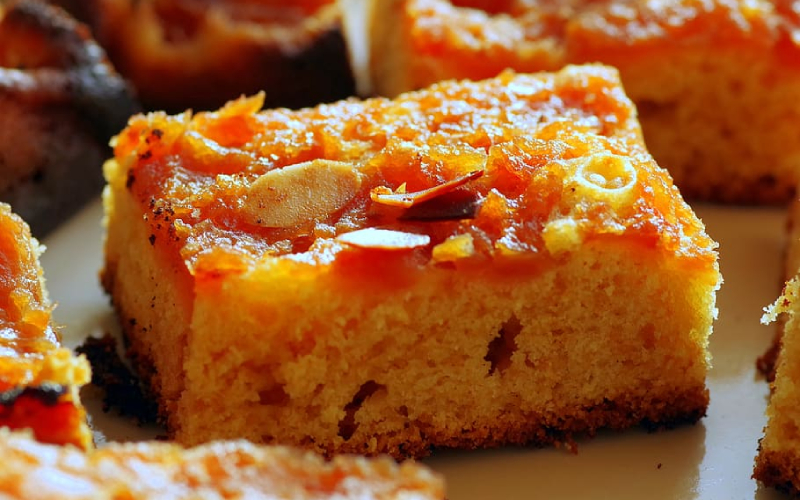
Irish Potato Cake Recipe
To end this list with a bang, we’re tossing in our Irish Potato Cake into the ring. Yes, you might be wondering: potato in a cake? It’s more likely than you think! This dense, but exquisitely moist cake is one filling dessert worth serving to a crowd. It’s made even more delicious with a sweet coconut frosting. And if you think a plain potato cake with frosting isn’t going to cut it, worry not! We’ve added a touch of chocolate in there to make it just as sweet as any other dessert. This is one easy and unique dessert that you should give a shot at your next family dinner!
Recipe for Inspiration: Irish Potato Cake Recipe
Was this page helpful?
Read Next: 60 Easy Seafood Recipes Even Beginners can Make
Maedelle
Maedelle is a content writer, bookworm, and former book blogger. She ran a book blog about YA fictional books and has participated in online creative writing competitions like NaNoWriMo. Her previous work in BPO companies were for clients that's focused on food services. This has amplified her existing love for food, and enjoys writing about it now. She hopes to one day travel the world and explore a great deal of cuisines to write about. Her favorite dishes to cook include Filipino and Italian, and she is on her way to learning more about Indian dishes.
Related Articles